3500W Demolition Hammer: 1900 BPM Breaker + 2 Chisels
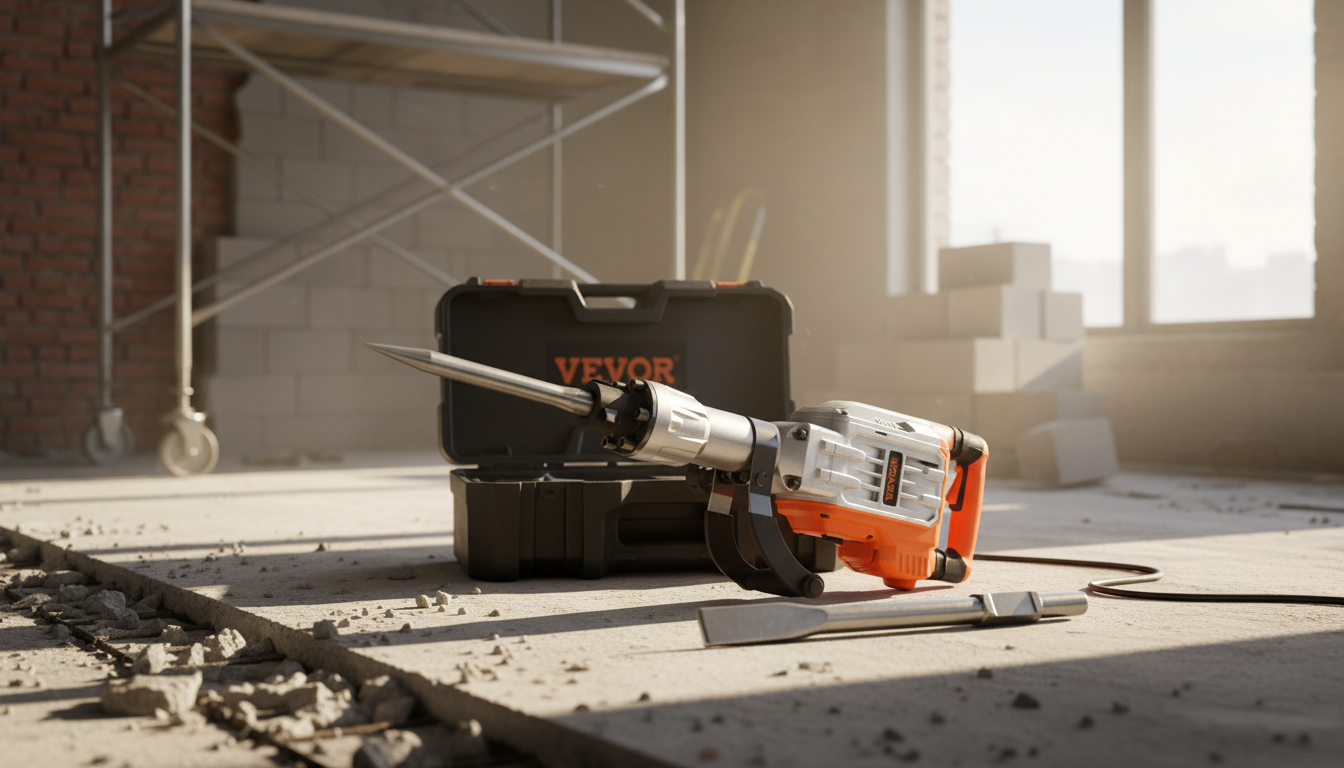
3500W Electric Demolition Jack Hammer (1900 BPM) Concrete Breaker With 2 Chisels
A high-power electric demolition hammer is built for fast breakup of concrete, masonry, and stone when a rotary hammer is not enough. A 3500W breaker with a 1900 BPM impact rate is geared toward sustained material removal—ideal for renovation tear-outs, slab removal, and chipping where you need consistent blows and solid mass behind the bit. Below is a practical guide to what this class of tool is suited for, how the included chisels are typically used, and what to keep in mind for safer, cleaner, more controlled demolition.
What This Demolition Hammer Is Designed to Do
Heavy electric breakers are made for impact-driven demolition, not drilling. The goal is to fracture and lift material efficiently, especially when the workpiece is too thick, too hard, or too extensive for lighter tools.
- Break up concrete slabs, footings, and pads during renovations or removal work.
- Chip masonry (brick/block), remove tile or mortar beds, and open channels for plumbing or electrical runs.
- Handle stubborn materials where repeated impact (BPM) matters more than drilling speed.
- Perform best for ground-level or bench work; overhead chipping is usually fatiguing with heavy breakers.
Key Specs and What They Mean on the Job
Specs aren’t just numbers; they shape how the tool behaves under load, how quickly it breaks material, and how manageable it feels during longer sessions.
Quick spec-to-task guide
| Spec or feature | Why it matters | Where it helps most |
|---|---|---|
| 3500W motor | More reserve power under heavy load | Thick slabs, reinforced pours, hard aggregate |
| 1900 BPM impact rate | Consistent impact cadence for sustained breaking | Slab breakup, trenching, pad removal |
| Point chisel | Focuses force into a small area to start cracks | Starting holes, breaking corners/edges |
| Flat chisel | Spreads force to lift, chip, and peel layers | Tile/mortar removal, surface chipping, edging |
| Electric power | No fuel storage; typically lower day-to-day upkeep | Indoor demo with ventilation and dust controls |
Electric operation is a real advantage for indoor or attached-garage projects: there’s no fuel mixing and fewer engine maintenance chores. The trade-off is power access—plan for a properly rated extension cord and use GFCI protection in damp or exterior environments.
Chisel Choices: When to Use Each One
The two included chisels cover the most common demo approaches: splitting/breaking and lifting/peeling. Switching at the right moment keeps progress steady and reduces the chance of the bit binding.
- Point chisel: Use it to initiate fractures, work along control joints, and break thick sections into manageable pieces. It’s also useful for starting a “pilot crater” in the middle of a slab when edges aren’t accessible.
- Flat chisel: Use it for scaling, removing mortar beds, lifting tile, and shaving high spots after the main breakup. It excels when the goal is separation rather than deep penetration.
- Technique tip: Let the tool’s weight and impacts do the work. Excessive downward force can reduce efficiency, increase vibration exposure, and tire you out faster.
- Edge strategy: Whenever possible, start at free edges or existing cracks to speed progress and reduce wedging.
Typical Work Scenarios and Expected Results
Driveway or patio slab removal
Work in sections. If there are control joints, follow them: start at an edge, use the point chisel to open cracks, then switch to the flat chisel to lift and separate chunks. Smaller chunks are easier to move and reduce the chance of the breaker getting stuck.
Basement or garage renovations
Trench or channel cutting
Masonry teardown
Handling, Control, and Fatigue Management
- Stance: Keep feet wide, tool close to the body, and shoulders square to reduce torque and rebound.
- Work-rest pacing: Use short breaks to limit hand-arm vibration exposure and maintain grip quality. Guidance on vibration risk and control measures is available from NIOSH.
- Cable management: Route cords away from the strike zone and sharp edges; avoid running the cable under broken chunks that can crush insulation.
- Noise and debris: Impacts are loud and fragments travel fast—use barriers or screens where feasible, and keep bystanders back.
Setup and Operating Tips for Cleaner Breaks
Safety Essentials: Dust, Silica, Vibration, and Electrical Use
- Respiratory protection: Concrete and masonry dust can contain respirable crystalline silica; follow control measures (wet methods, vacuum attachment when applicable, isolation) and use appropriate respiratory protection. See OSHA’s silica standard (construction) for details.
- Hearing protection: Demolition hammer use can exceed safe exposure levels quickly; use rated ear protection and review basics at OSHA’s noise/hearing conservation guidance.
- Eye/face and hand protection: Wear safety glasses or a face shield and durable gloves to manage chips and vibration.
- Electrical safety: Use grounded outlets, outdoor-rated extension cords when needed, and GFCI protection for exterior or damp conditions.
Care, Storage, and Common Troubleshooting
Who This Tool Fits Best
Shop In-Stock Options
- 3500W Electric Demolition Jack Hammer – 1900 BPM Concrete Breaker with 2 Chisels
- 55PCS Interlocking Drainage Floor Tiles (useful for creating a non-slip, easy-to-clean staging area in a garage or entry during messy demo work)
FAQ
What are the two chisels used for?
The point chisel concentrates force to start cracks and break deeper into concrete, while the flat chisel spreads force to chip, lift layers, and pry material loose. For example, use the point to open a slab corner, then switch to the flat chisel to peel up the separated section.
Can it break reinforced concrete?
It can break the concrete around rebar and help expose reinforcement, but the rebar itself typically must be cut with a separate tool. Working in smaller sections helps prevent binding when steel is present.
What safety gear is recommended for concrete breaking?
Use eye/face protection, hearing protection, durable gloves, and sturdy footwear, plus silica-dust controls such as proper ventilation and a correctly selected respirator when needed. For electric tools, GFCI protection is recommended in damp or outdoor conditions.















Leave a comment